May 5, 2026

Turning a design into a finished product takes more than creativity. Without structure, details get lost, samples miss the mark, and production slows down throughout the fashion industry.
For fashion designers and teams managing the product development process, a clear system keeps work organized as collections grow. Many start with a tech pack template when creating tech packs to manage that complexity.
A tech pack brings sketches, materials, measurements, and notes into one document so factories know exactly what to make and how to make it. Done right, it saves time, cuts costs, and helps teams move from concept to production with confidence.
In this guide, we’ll break down what a tech pack is, why it matters, and the key pages it should include.
TL;DR
A tech pack example shows how fashion teams organize sketches, materials, measurements, and instructions into one document so factories can produce garments accurately.
A complete tech pack reduces errors, improves fit consistency, supports accurate costing, and keeps teams aligned during the product development process.
Key components include fashion flats, BOMs, measurement specs, grading, construction details, labeling, packaging, costing, and approvals.
The core steps to create a tech pack are: build technical sketches, define measurements, list materials, document construction, add costing, set packaging, and review versions.
Onbrand PLM helps teams manage tech packs in one system, reduce version confusion, and speed up development with real-time collaboration.
What Is a Tech Pack?
A tech pack, also called a specification sheet or technical pack, is a comprehensive document that details every aspect of a style so a factory can produce it accurately and consistently.
It includes fashion flats, materials and trims, measurement specs, grading rules, and other technical specifications that define how the garment should be made.
For manufacturers, a tech pack is the starting point. Most will not begin sampling or quoting without one, since it lays out everything needed to build a finished garment.
For design and product development teams, a professional tech pack acts as a single reference that keeps decisions, revisions, and notes in one place.
The main purpose of a tech pack is to reduce back-and-forth, prevent errors, and help teams move to market faster.
With a clear spec sheet, fewer samples are needed, costs are easier to track, and the final product stays aligned with the original design.
Why Is a Tech Pack Important?
A complete tech pack turns design intent into clear, buildable instructions and prevents avoidable rework. Here is why a complete tech pack is important for every style:
Saves Time and Money
Managing samples is easier when you have a tech pack. With specifications documented up front, factories can produce samples that closely match the original design instead of wasting rounds on corrections.
That is important for any business, especially when timelines and budgets are tight. Fewer revisions lead to lower development costs and more accurate launch schedules.
Supports Accurate Price Quotes
When factories have clear specs, they can figure out the fabric yield, labor hours, and processing needs without having to guess.
When suppliers know exactly what’s required, they can provide precise pricing. This reduces the risk of unexpected costs later in the process and helps avoid underestimates that lead to unexpected charges or missed budget targets.
Improves Fit Consistency
Fit issues are one of the most common reasons garments fail in production. A tech pack defines every measurement point, from body length to shoulder drop, with tolerances that keep sizing consistent from one run to the next.
This helps the final garment fit as intended and meet brand expectations.
Strengthens Quality Control
Every factory sample can be checked directly against the measurements, construction details, and materials outlined in the tech pack.
Any deviation is flagged early, helping teams maintain consistent quality before bulk production begins.
Keeps Teams Aligned
Design, product development, sourcing, and vendors often work in different systems. A centralized tech pack keeps everyone connected to the same version of the truth.
Comments, revisions, and approvals stay in one place, so teams can move through the production process with clarity and fewer misunderstandings.
What Does a Tech Pack Include?
A tech pack is rarely a single page. It’s a full set of pages that explains every detail of a style, from the first sketch to the last step in packaging. Each section has a specific role in guiding the manufacturing process and reducing the risk of mistakes.
Here’s what should be included in a complete pack:
Fashion Flat Sketches
Also called technical sketches, these clean black-and-white line drawings show the garment from multiple views, including front, back, side, and inside angles.
They give pattern makers and factories a precise visual reference, helping them build the garment exactly as intended.
Flats should be drawn digitally in Adobe Illustrator for accuracy, using solid lines for seams, dashed lines for stitching, and clear labels for closures and placement details.
Designers often use reference images or reference garments to guide proportions, garment construction details, and overall layout during this stage.
Flats can also highlight design elements such as darts, pleats, topstitching, and artwork placement.
Without complete flats, factories may misinterpret proportions or construction, which can lead to costly production errors and samples that fail to match the original design.
Bill of Materials
The bill of materials (BOM) is the master list of everything needed to construct the garment.
It is an essential part of the tech pack because it supports accurate costing, reduces the chance of missing components, and keeps production repeatable season after season.
What to include in the BOM:
Fabrics – Main fabric, lining, or different fabrics used in the garment
Trims – Zippers, buttons, snaps, hooks, thread
Labels – Care, size, and brand labels
Packaging – Hangtags, polybags, cartons, barcodes
Supplier data – Vendor name, color codes, yield, MOQ, and lead times
Visual references – Swatches or computer-aided design (CAD) drawings
A clear BOM makes it possible to request an accurate price quote from factories and supports the creation of a reliable garment cost sheet. It also prevents delays when sourcing materials from multiple suppliers.
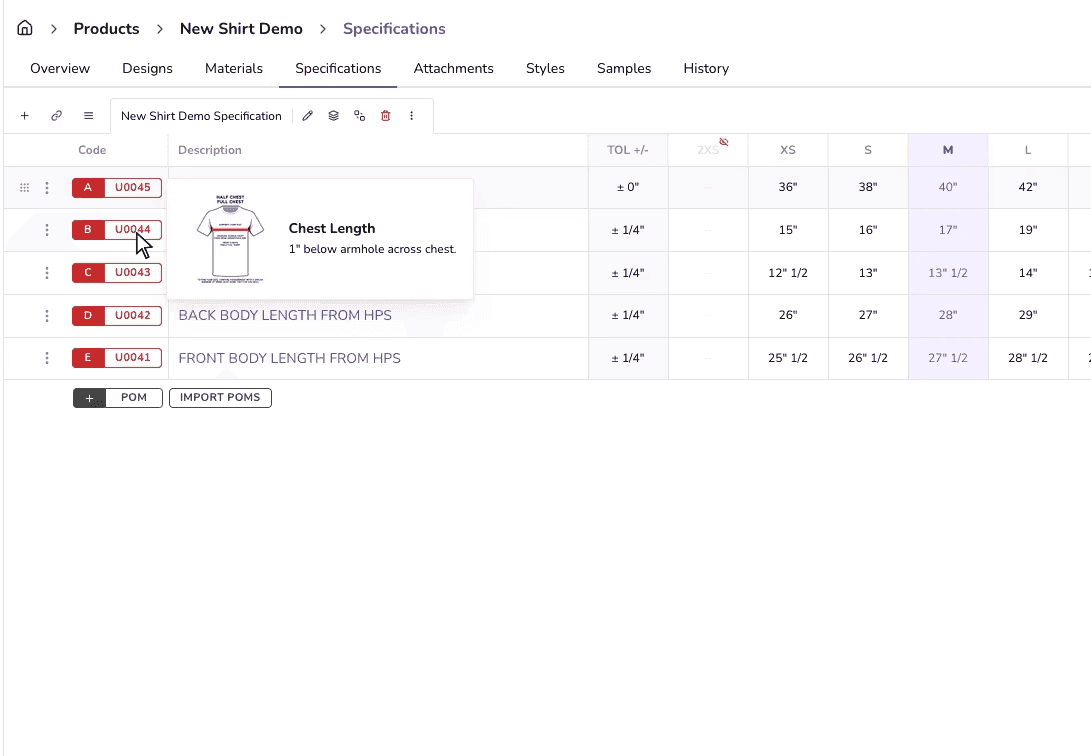
Garment Measurement Specs
The measurement spec sheet defines the fit of the garment. It uses a base size and lists all points of measure (POMs) with tolerances, giving teams a clear reference point so every sample can be checked consistently during fittings.
Add notes on how to measure, include tolerances (e.g., ±0.5 cm), and provide space to record sample measurements for comparison with intended values.
Common POMs include:
Body length from the shoulder to the hem
Chest width across front and back
Waist and hip circumference
Armhole and sleeve opening
Shoulder drop and neck opening
Additional details such as cuff width, collar height, or pocket depth
Without this section, garments can be approved with inconsistent fits, leading to higher costs and unsellable stock.
Grading
Grading extends the base size into the full size range, keeping proportions consistent as sizes scale up or down.
A clear grading page should explain how each measurement point changes between sizes, with separate guidance for knit and woven garments.
It can also include notes for adjustments in areas like the chest, hips, or sleeves to maintain both comfort and fit. This helps factories avoid producing size sets that feel inconsistent, a common issue for consumers.
Construction and Stitch Details
Factories need clear construction notes to assemble the garment correctly. Even with complete flats, missing stitch information can lead to methods that don’t meet your quality standards.
This section should specify seam types such as lockstitch, overlock, or flatlock, along with stitches per inch (SPI) to guide durability. It also covers reinforcements like bartacks or rivets at stress points, plus interlinings or padding for structure.
Diagrams of high-stress areas, such as pocket corners or shoulder seams, help factories avoid weak construction. This level of detail is especially important for garments that experience heavy wear, such as jeans or activewear.
Artwork and Labeling
Brand identity and compliance both depend on this page, since it shows factories where and how to apply logos, graphics, and care information.
A complete section should include placement diagrams for prints or embroidery, artwork dimensions, and care label content in the required languages. It also specifies the label type, such as woven, printed, or heat transfer, along with material requirements.
Without this information, garments risk being misbranded or failing compliance checks in certain markets.
Colorways
Colorways define the approved colors and finishes for each version of the garment, helping factories avoid costly production mistakes.
A complete page should list palette codes for all approved colors and show how fabrics, trims, and threads map to each version.
It can also note special treatments, such as washes, dye methods, or finishes, that are often used in categories like denim or activewear. Documenting this clearly keeps every variation consistent from one production run to the next.
Quality and Testing
Quality and testing define the testing processes required prior to production sign-off, assisting in the prevention of quality concerns that may arise after items reach customers.
It should include shrinkage findings from wash and dry cycles, colorfastness tests for washing, rubbing, and light, and stretch and recovery testing for performance fabrics.
An acceptable quality level (AQL) plan with clear pass-or-fail rules also exists, providing factories with precise criteria to follow before bulk production begins.
Packaging and Folding
Packaging makes sure each garment reaches the customer in the right condition and aligns with brand standards. This page explains how products should be folded, the type and size of polybags required, and the carton dimensions and pack ratios to be used.
It also specifies where carton labels and barcodes should be placed. Without these details, inconsistent packaging can increase shipping costs and cause issues with retailers, making this section crucial for smooth delivery.
Costing Snapshot
The costing page brings together all expenses for a style, giving both brands and vendors a clear view of financial expectations before production starts.
It should outline material and trim costs by supplier, labor rates, with cut-and-make times, and overheads such as utilities, admin, and storage.
Freight and logistics assumptions are also included, leading to a final unit cost for both samples and bulk production. A costing snapshot is often used during factory negotiations and helps teams avoid hidden costs that could impact margins.
Timeline, Approvals, and Change Log
Every style goes through revisions, and this page records each step so nothing is lost and everyone stays aligned on the current version.
It should capture key milestones like sample due dates, fittings, and approvals, along with notes from each round of samples and their sign-offs.
A change log with version history and comments provides visibility into what was updated and when. This level of tracking prevents confusion between teams and guarantees the final product reflects the agreed specifications.
How to Create a Tech Pack
Creating a tech pack is about turning design ideas into factory-ready instructions. Here’s a step-by-step process that fashion teams can follow:
Step #1: Create Accurate Technical Sketches
Begin with clean front-and-back sketches, also known as flat sketches or fashion flats. This step is a core part of the design process, where the focus stays on construction and proportion rather than styling.
These sketches form the foundation of your tech pack design, so keep lines precise, label seams and panels, and add callouts for stitching or special details.
Many designers rely on Adobe Illustrator to produce consistent, factory-ready sketches. If needed, include close-up views of complex areas such as pockets or trims.
Step #2: Build the Measurement Specification Sheet
Your spec sheet records exact measurements for each point of measure, such as chest, waist, inseam, sleeve length, and neck opening. Always add tolerances to define acceptable variations.
This page is important for pattern makers and quality teams, so every sample matches your fit expectations.
Step #3: List Materials in the BOM
The BOM is your complete inventory of fabrics, trims, and packaging components. Include fabric type, fiber content, weight, color codes, and supplier details. For trims, specify zippers, buttons, snaps, or labels with placement notes.
The more precise the description, the fewer errors during sourcing. A strong BOM also feeds directly into your costing and helps standardize future production.
Step #4: Document Construction and Assembly Details
Explain how to build the outfit. This step addresses both garment structure and the sewing techniques required to bring the concept to life.
Specify stitch types like overlock, flatlock, or lockstitch, and note seam placements, reinforcement areas, and finishing details.
Diagrams or callouts make this section easier for factories to follow. Clear construction instructions improve quality control and reduce costly resampling.
Step #5: Add a Cost Sheet
A cost sheet summarizes expenses involved in producing the garment, including fabric and trim costs, labor, packaging, and overhead.
Even an early estimate helps guide decisions on pricing and minimum order quantities (MOQs). Transparent costing keeps both your team and vendors aligned.
Step #6: Define Packaging and Labeling Requirements
Packaging details are just as important as design details. Specify folding methods, polybag types, hangtag placement, barcodes, and care label requirements.
Getting this right protects your brand identity and keeps retailer compliance smooth. Clear instructions also save time for quality control teams.
Step #7: Final Review and Version Control
Before sending your well-crafted tech pack to a vendor, review it thoroughly for accuracy and completeness. Check that sketches, measurements, and BOM details align. Use consistent formatting so factories can navigate easily. Save with clear file names and track versions carefully.
If you’re working in fashion PLM software like Onbrand PLM, version history and live collaboration make it easier to avoid errors and keep your team in sync.
A well-prepared tech pack shortens development time, reduces mistakes, and gives factories everything they need to start building your design exactly as intended.
Do It Faster With Onbrand Live Tech Packs
Onbrand PLM turns static PDFs and spreadsheets into living tech packs that keep sketches, BOMs, POMs, grading, construction notes, and comments in one place.
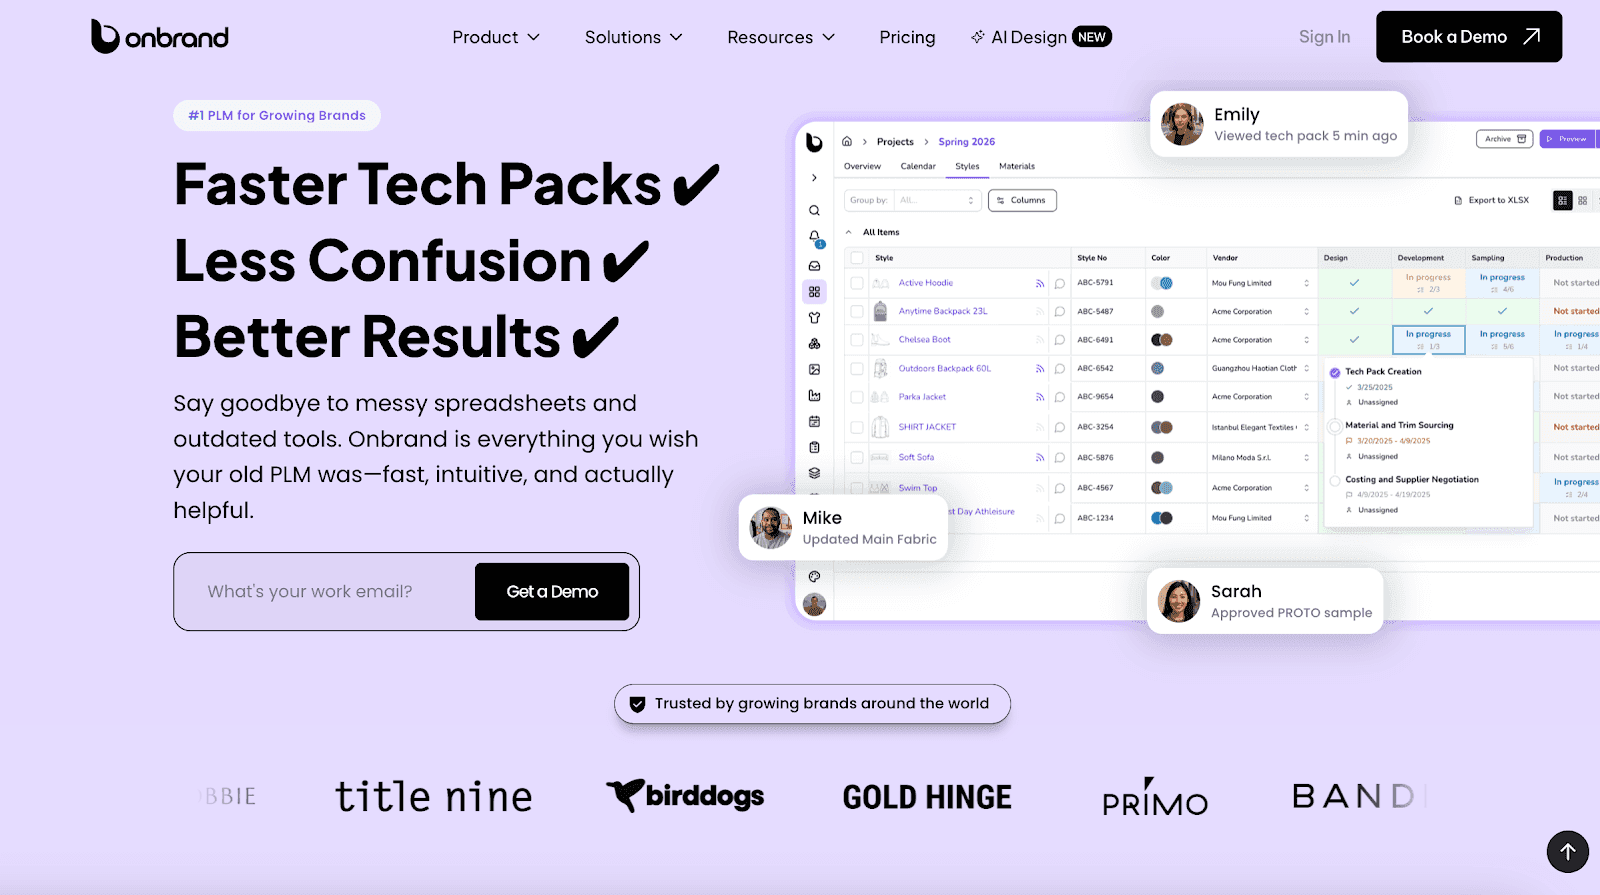
Designers, developers, sourcing, and vendors work in the same file, so feedback, approvals, and updates stay attached to the style. No more chasing versions or digging through email threads.
Teams see measurable gains with Onbrand PLM. Brands report 55% faster tech pack creation, four weeks shorter development time, and a ten-day data migration and implementation window.

Fast onboarding, modern UX, and configurable workflows let you keep the way you work while removing version churn and duplicate entry.
Onbrand PLM is built for real vendor collaboration. Assign multiple factories to a single tech pack, keep pricing and conversations siloed per vendor, and maintain a clean audit trail of what changed and when.
Your factory always opens the latest version, and your team always knows what was approved.
Teams working on early concepts can also use Onbrand AI Design to generate and refine ideas before moving them into structured tech packs in Onbrand PLM.
Key features:
Template-driven setup – Build consistent tech packs with pre-set components and layouts that keep styles aligned.
Libraries that scale – Reuse fabrics, trims, sizes, artwork, and specifications for different collections to save time.
Version history and rollbacks – Track every update and roll back safely when needed to avoid costly errors.
Real-time vendor comments – Keep questions and feedback directly tied to the page and style, not buried in email.
Dual-sourcing controls – Assign multiple factories to a single tech pack while keeping pricing and communication separate.
Auto PDF export – Create a factory-ready packet in one click, with CSV options for BOM and POM when required.
Tasks, approvals, and T&A – Assign responsibilities, set deadlines, and track sign-offs without using extra tools.
Fast onboarding and migration – Import existing data quickly and get teams working in days, not months.
Dedicated support – Work with a real partner who knows your process, not just a ticketing system.
Onbrand PLM makes tech packs manageable and clear. Your styles stay current, your vendors stay aligned, and your team spends time creating product instead of hunting files.
Tech Pack Examples Across Industries
Every category has unique requirements, but the goal is always the same: clear, accurate, factory-ready documentation. Here are a few examples of how tech packs come to life in different industries:
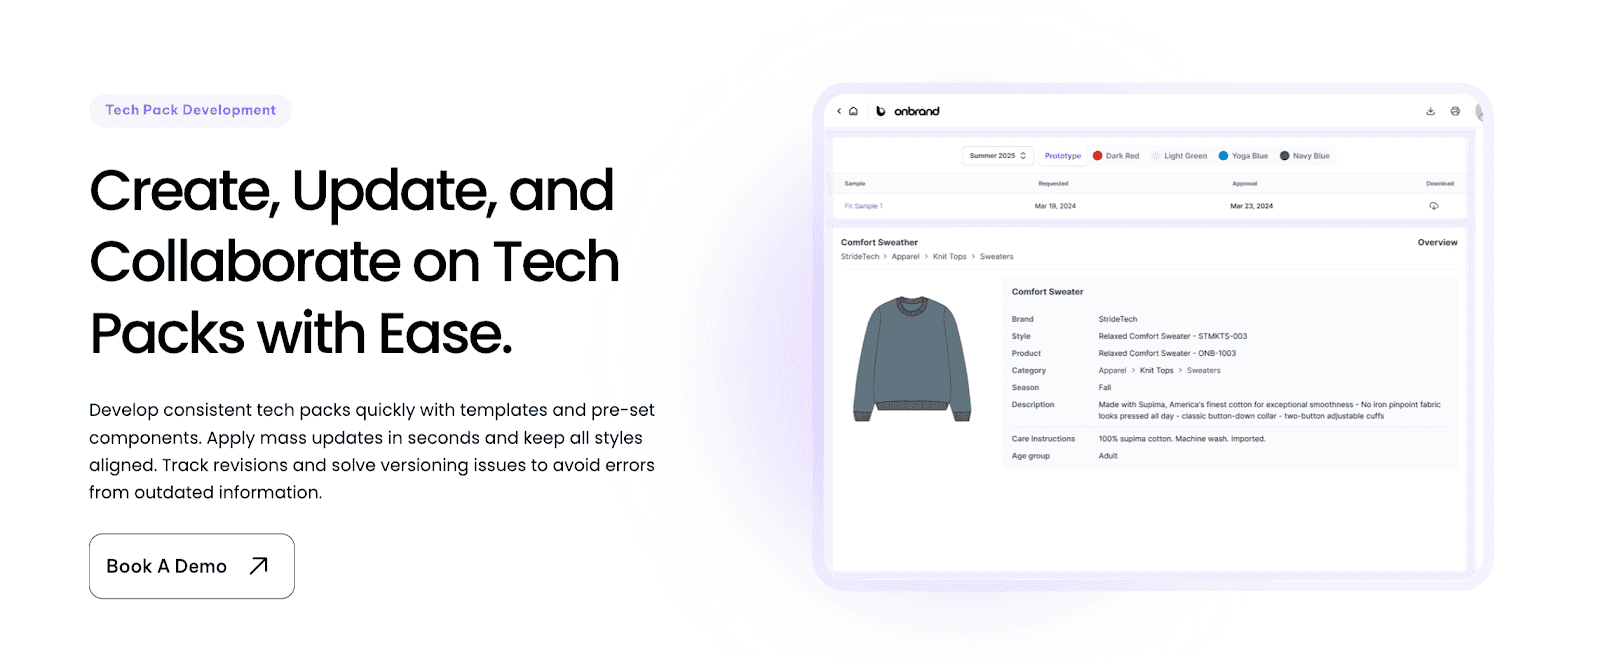
Fashion & Apparel
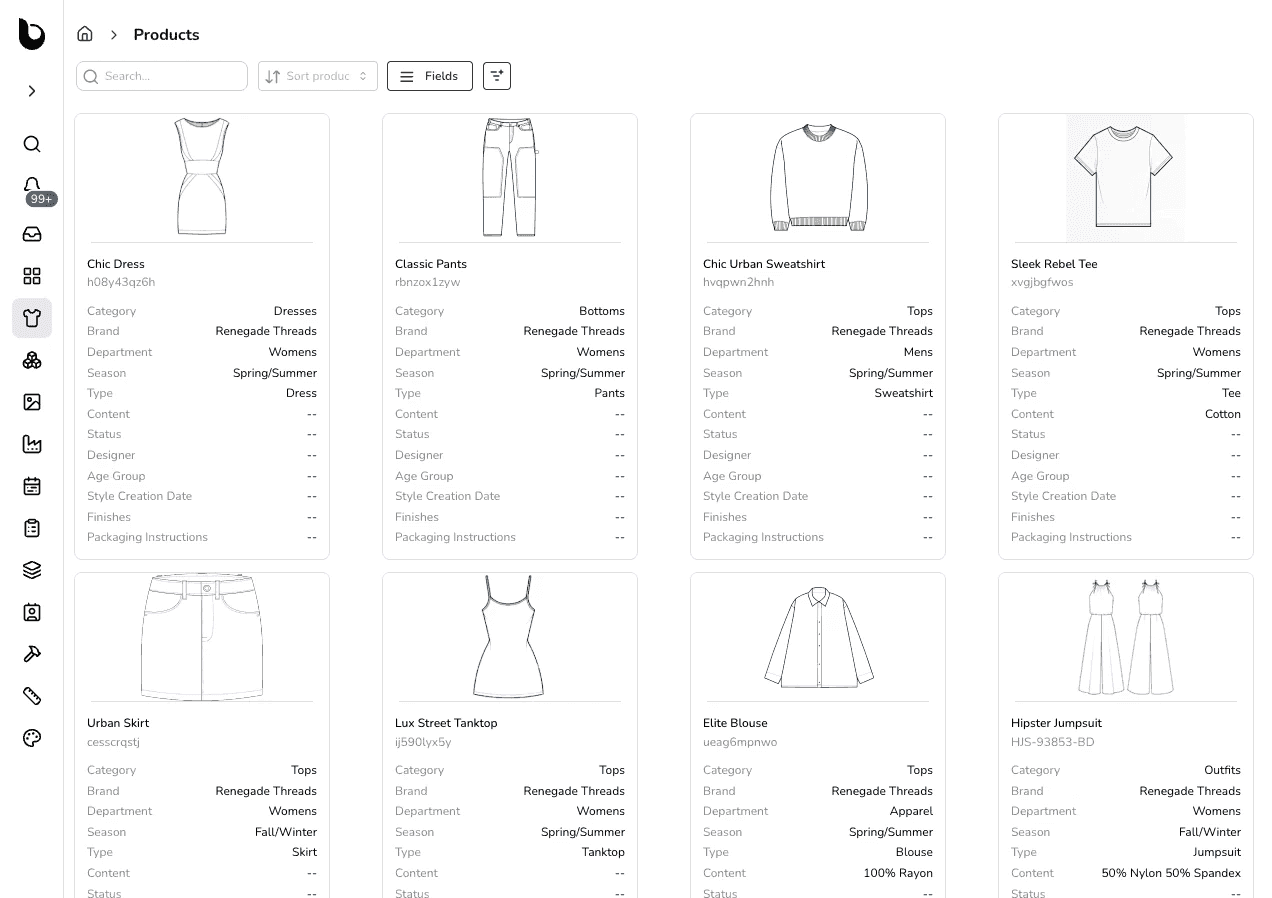
Onbrand PLM helps fashion and apparel teams move faster by keeping sketches, BOMs, and approvals in one place. This setup works well for both large teams and small fashion brands managing growing collections.
Seasonal drops, including everyday clothing and basics like T-shirts, stay on track with real-time collaboration and live updates that remove the clutter of spreadsheets.
Footwear
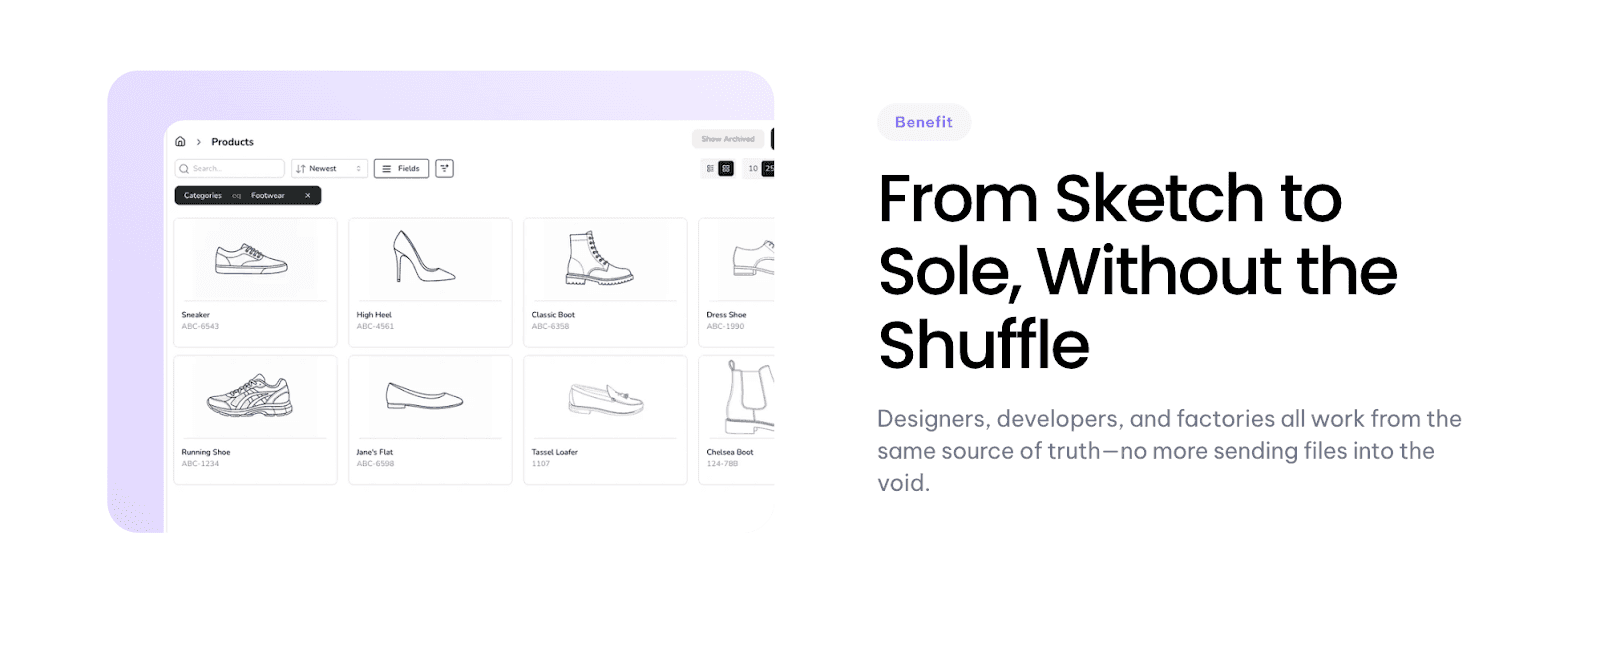
With complex builds, materials, and layered components, footwear development is anything but simple. Onbrand PLM makes it easier by managing every detail in one collaborative workspace and keeping factories aligned from sketch to sole.
Outdoor & Sports
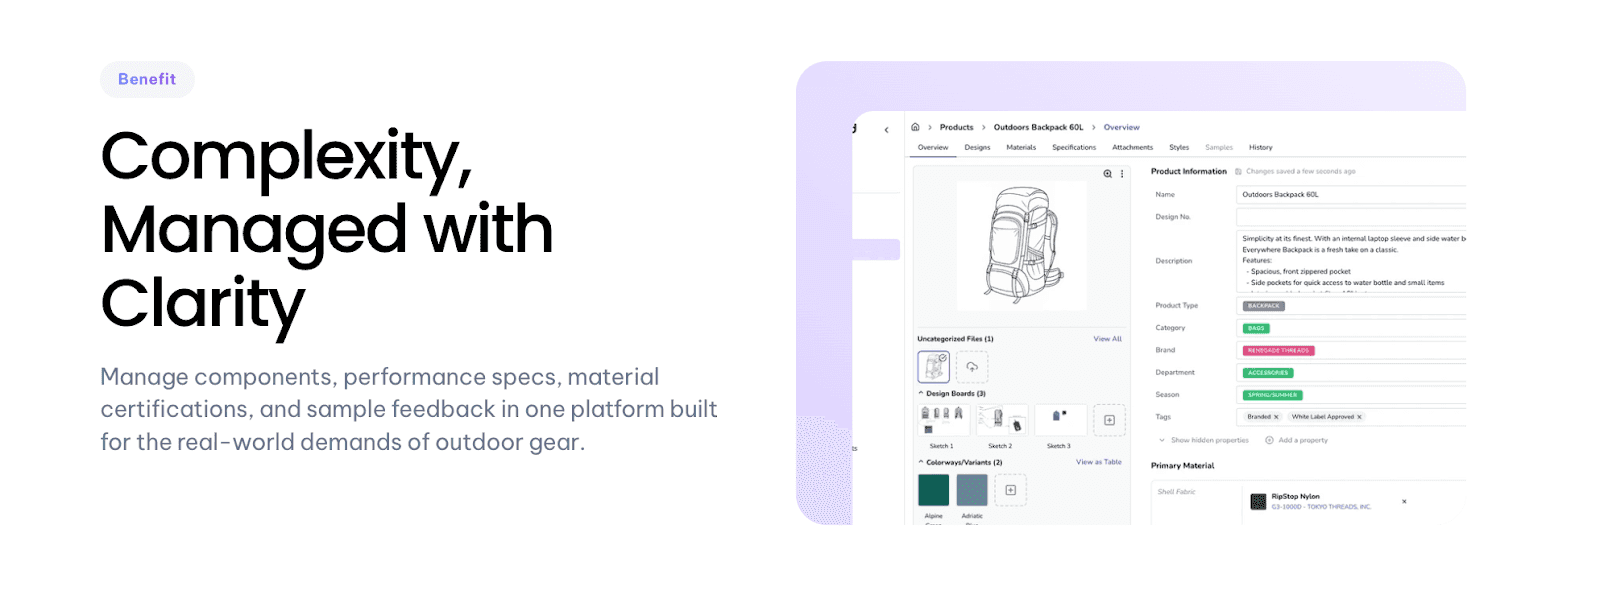
Performance gear requires precision and compliance. Onbrand PLM supports outdoor and sports brands by organizing layered specs, material certifications, and testing requirements so teams can innovate with confidence while staying audit-ready.
Home & Furniture
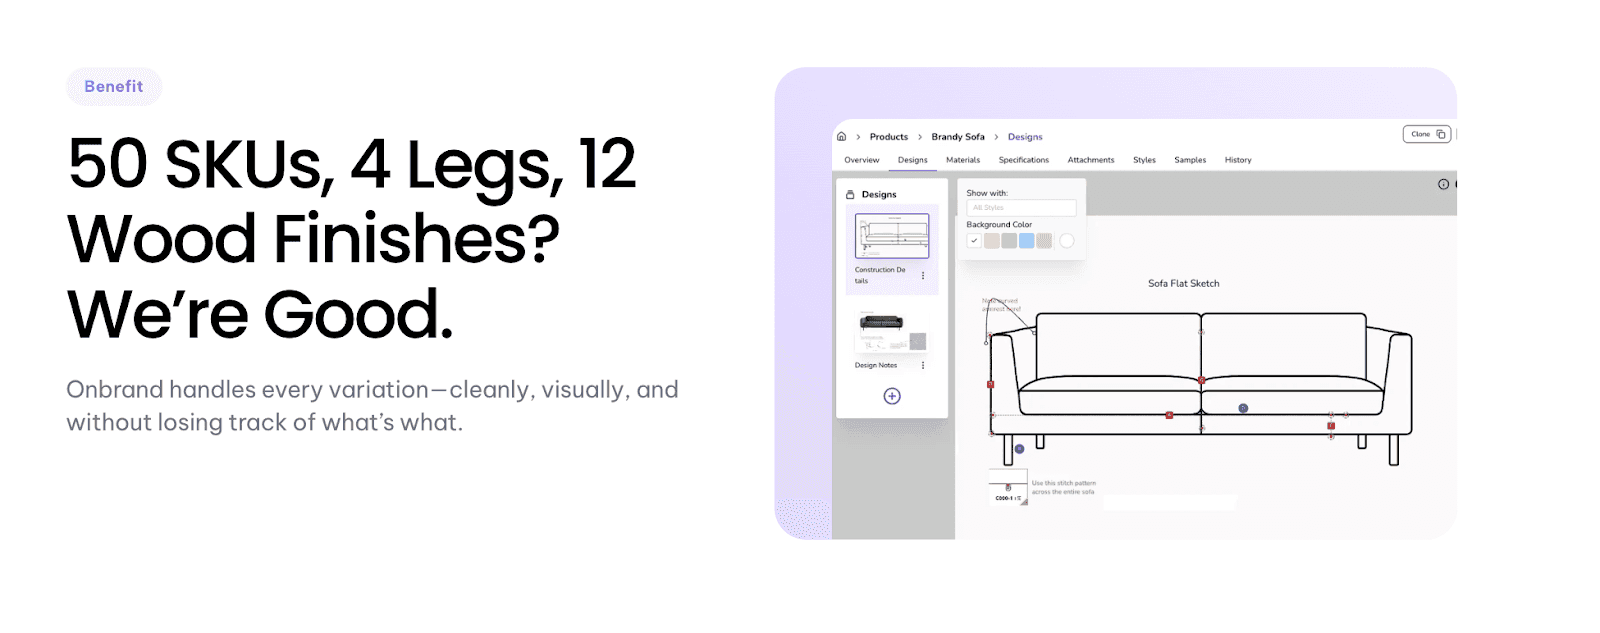
Managing fabrics, finishes, and dozens of variations per product is complex. Onbrand PLM gives home and furniture brands a clean, visual system to track details, communicate with vendors, and reduce costly errors.
Onbrand PLM: The Modern Way to Create and Manage Tech Packs!
A tech pack is the foundation of product development. It keeps design intent clear, reduces costly mistakes, and helps factories deliver exactly what was envisioned. From flats and BOMs to measurement specs and packaging, every detail plays a role when turning ideas into finished products.
With Onbrand PLM, creating and managing tech packs becomes faster, cleaner, and more collaborative. Teams cut weeks off development timelines, avoid version confusion, and keep vendors aligned in real time.
Instead of dealing with scattered files and endless updates, everything lives in one connected system built for modern fashion, footwear, outdoor, and home brands.
FAQs About Tech Pack Example
What is included in a tech pack?
A tech pack usually includes technical flats, a BOM, measurement specs, grading, construction notes, labeling, packaging, and costing. These sections give factories everything needed to produce a garment accurately. Both large teams and small brands use tech pack templates to standardize this process for different styles.
What should a tech pack look like?
A tech pack is typically a structured PDF or digital file with a clear cover page showing style code, name, season, and version. Inside, each page is organized by function, including sketches, BOM, measurements, and notes, so factories can follow instructions without confusion.
How to create a technical pack?
To create tech packs, start with clean flats, add a live BOM, and define points of measure in a spec sheet. These steps act as a practical, ultimate guide for building a complete, factory-ready pack. Include grading rules, construction details, and artwork placement before exporting for factory use. Onbrand PLM makes this faster with pre-set components and reusable libraries.
How much do people charge for tech packs?
Freelance designers may charge per style, often ranging from $50 to $2,000, depending on complexity. Agencies and experienced technical designers may price higher, especially if packs are created based on custom patterns or advanced detailing. Costs vary by region, experience, and type of business.
Can I see real-life examples of tech packs?
Yes. Many brands share real-life examples to highlight design details and best practices in clothing production. You can also download sample templates to use as a reference and adapt them for your own development process.

